1.Registering your store
Potential retailers can register via a registration form.

Note: The Vendor/Retailer Name must be unique and determines the name used throughout the store. If the name is taken, an error will be returned after submitting the form.
Once a Retailer has submitted the form, the Marketplace Admin gets an email notification that a vendor/retailer has applied and a user account is created for the retailer.
A status/role of Pending Vendor is assigned until the Marketplace Admin approves registration and applies a different role. There are two possible roles:
Vendor Admin – Has access to all settings.
Vendor Manager – Has limited access to the Vendor dashboard.
A vendor/retailer then receives an email stating their application has been approved, along with the username and password. They can start to set up and manage their store.
2. Vendor/Retail Store Settings
Retailers can configure settings in their store dashboard as they wish, by going to the Store Settings.
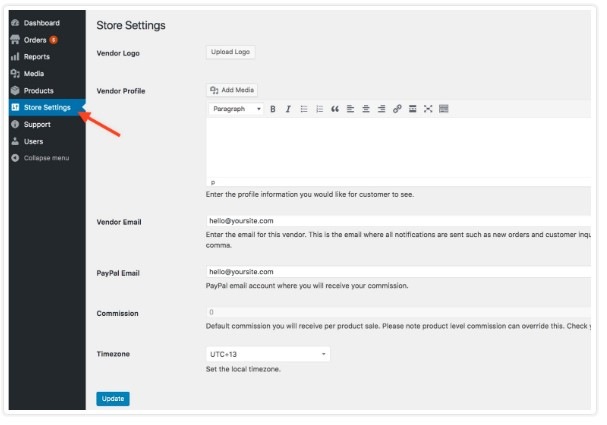
Settings fields, from the Vendor Admin dashboard:
- Vendor Logo
- Vendor Profile: Enter a description of you and your store.
- Vendor Email: List of email addresses, separated by a comma, that receive store-related notifications.
- PayPal Email: Email associated with the vendor’s PayPal account, to receive payments.
- Commission: This is set by the Store Owner.
- Timezone: Location of the vendor store.
3. Adding your Products on the Marketplace
To add products on the Marketplace:
- Navigate to the the product module > add products. All users who have been granted access to your store's dashboard can add/edit products.
- Fill-in the information for:
- Product Name
- Description of the Product
- Product Category
- Product SKU
- Retailer City
- Retailer State
- Regular Price
- Inventory Quantity
- Shipping Cost
- Retailers DO NOT NEED to upload a product picture, the system will take care of attaching a Hi-Resolutiion image once the Administrator approves and publishes the post.
All products added will need to be approved by the Mark Roberts Marketplace admin before appearing on your store's frontend.
3.1 Rule Guide for Optimizing Descriptions for SEO
3.1.1. Importance of Keywords:
- Use relevant keywords in both the short and long descriptions to enhance visibility in search engines.
- Keywords should reflect the collectible, season, and/or dimensions accurately to match what potential users are searching for.
3.1.2. Short Description Optimization:
- The short description is your first impression—keep it concise (under 150 characters).
- Include one or two primary keywords that best describe the product so that consumers may find them easily and for greater SEO visibility.
3.1.3. Long Description Optimization:
- Provide a detailed explanation (between 150-300 words) that elaborates on the content, service, or product.
- Use a mix of primary and secondary keywords naturally throughout the text.
- Make the description engaging and informative, avoiding keyword stuffing.
3.1.4. Readability and Relevance:
- Maintain a balance between using keywords and making the content readable and valuable.
- Always prioritize providing useful, clear information for the user.
3.1.5. SEO Benefits:
- Well-optimized descriptions improve search engine rankings, enhance click-through rates, and drive more organic traffic.
- Relevant keywords in descriptions help target the right audience and increase the chances of conversions.
By following these guidelines, you can ensure that your descriptions are not only optimized for SEO but also provide meaningful content to the user.
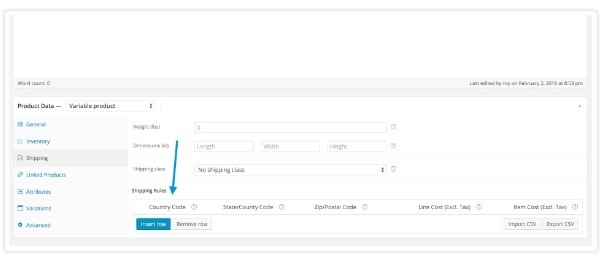
3.2 Adding Shipping Cost
After creating your product, you must not forget to assign a shipping cost. Shipping cost are product specific. If no shipping cost is assigned, the system will assume that you are offering FREE shipping for that particular product.
You can assign your shipping cost on the Shipping Module on the Product Data tab

Under the shipping rule, enter
ONLY on the following fields:
- Country
- Line Cost or Item Cost
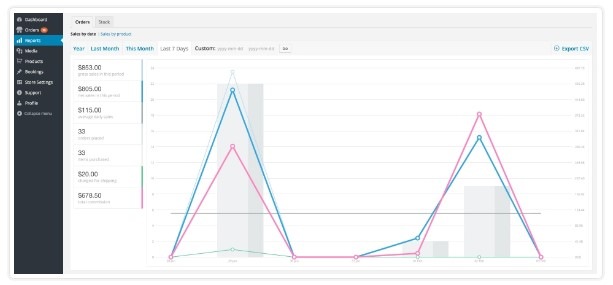
4. Reports
This module shows your store's performance.
5. Product Selling Fee and Penalties
PRODUCT SELLING FEE
The Mark Roberts Marketplace charges the following fee for every successful orders(sale):
- Selling Fee of 10.75%
OUT OF STOCK PENALTY
It is important to keep your inventory up to date at all times. If a product in your store is sold but you do not have inventory for it, a 10% penalty may be impose on the commission for the order.
6. Roles
A Retailer can have one of two different roles:
- Vendor Admin – Has access to all settings: Orders, Reports, Media, Products, Store Settings, Support (contacts the Marketplace Admin), and Profile
- Vendor Manager – Has limited access to the Vendor dashboard: Orders, Media, Products, and Profile.
7. Shipping and Fulfillment
7.A. SHIPPING
Retailers are responsible for fulfilling and shipping/sending orders after a customer has bought their product(s).
Payments are processed by a third-party merchant service company, which means that once an order is marked processing, it is ready to be fulfilled.
Retailers have ONLY 5 days to process and mark an item fulfilled. Any orders not marked fulfilled after 5 days, the system automatically cancels them.
Per Product Shipping
Retailers need to set up their own shipping costs per product. This is set in Product Data under Shipping > Shipping Rules.
Retailers may also opt to use the Mark Roberts Standard Shipping Class:
- Small Fairy or Elf - $14.95
- Medium Fairy or Elf - $18.95
- Large Fairy or Elf - $20.95
- Collectible Santa - $22.95
- Small Witch - $16.95
- Large Witch - $18.95
- Collectible Stocking Holder - $22.95
- Ornaments and Garlands - $ 8.95
- Picks - $ 6.95
When entering the product's shipping cost, you must determine whether an item's shipping cost is a Line Cost or an Item Cost,
Line Cost Shipping - An Item on the cart will be charged each a fixed shipping cost regardless of quantity. Shipping cost is calculated per item rather than per quantity
Item Cost Shipping - An item on the cart will be charged based on the number of quantity on the order.
7.B Entering the tracking numbers and Marking an Order Fulfilled
Tracking numbers - When an item has been shipped, you can enter the tracking number on the order notes. Once the tracking number have been entered be sure to change the note from Private to Note to Customer and click add. This will automatically send an email with the tracking number to the customer.
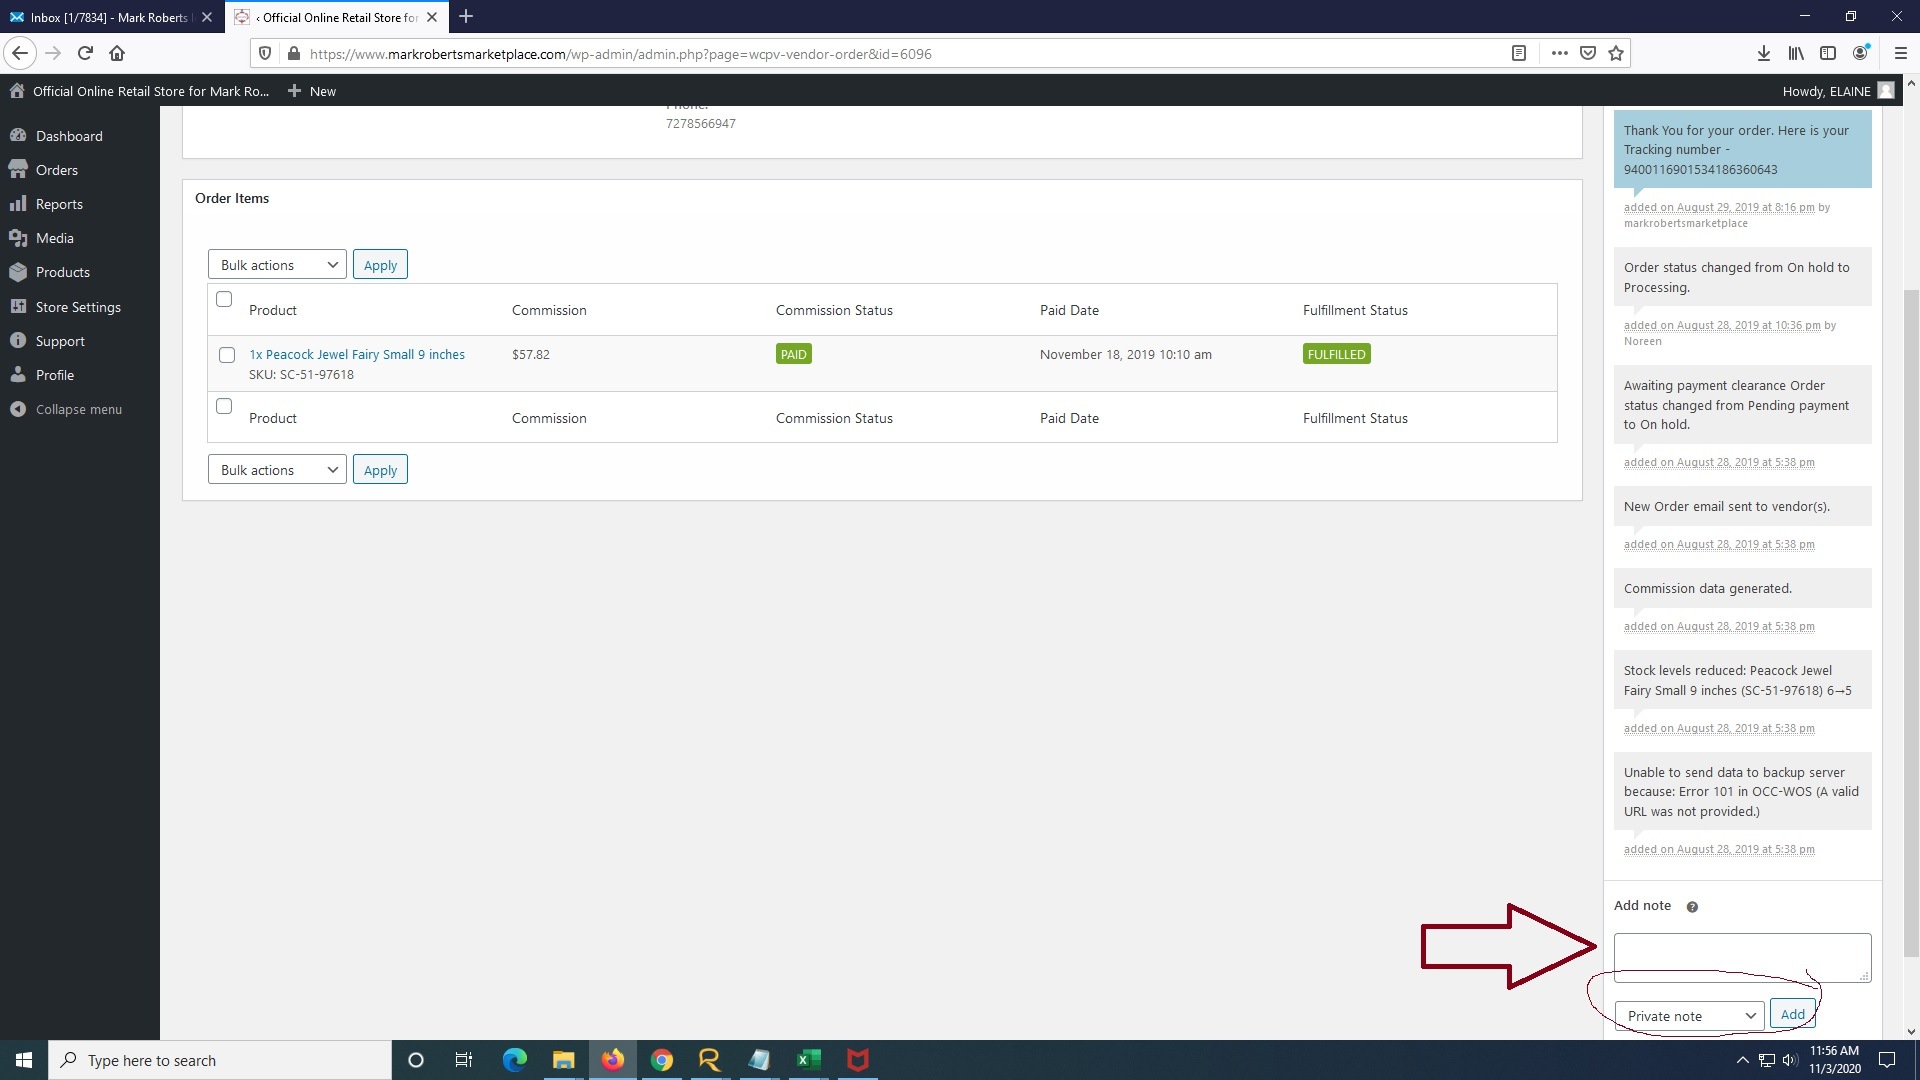
Marking an Order Fulfilled - It is important that all orders that have been shipped must also be marked Fulfilled. Marking or tagging an order fulfilled informs us that the amount you earned for the order can be generated and included in the month end report.
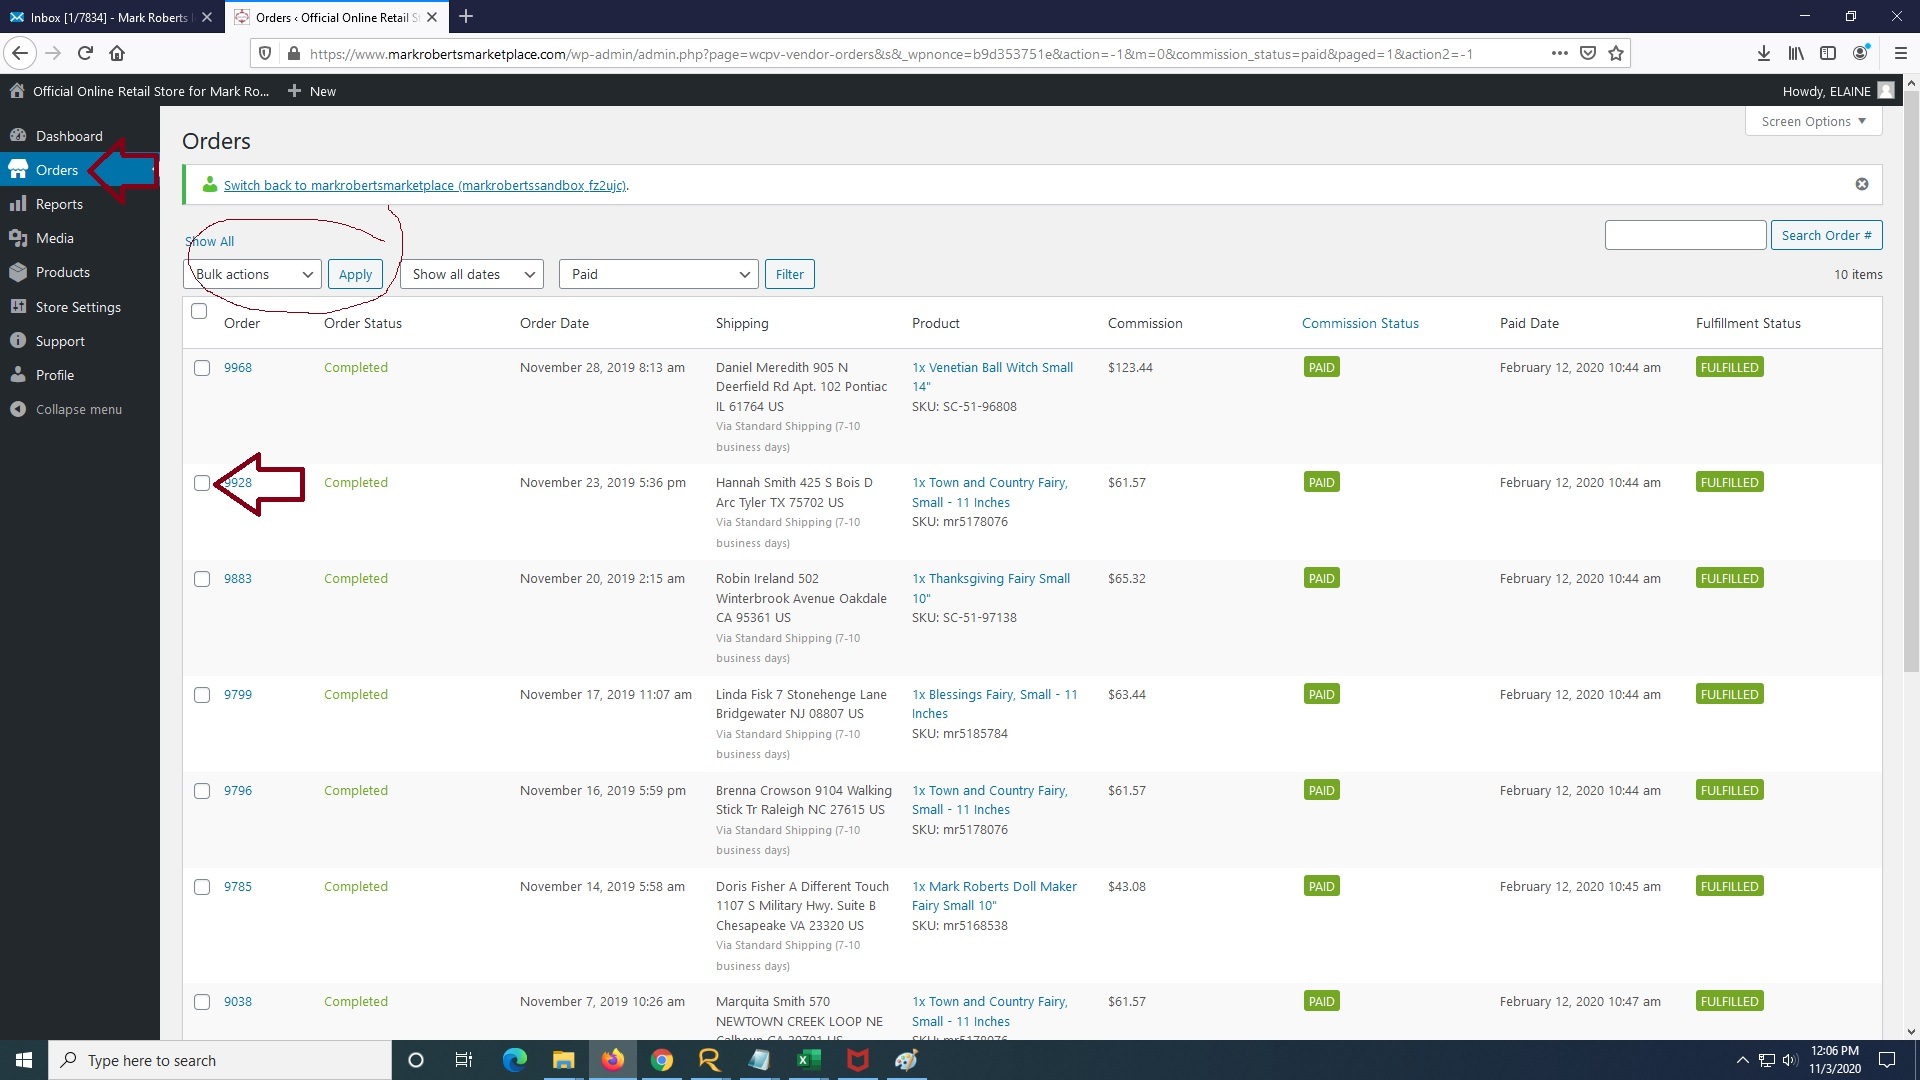
You can mark an order fulfilled by:
1. Clicking on the orders module on the left side of your dashboard
2. Placing a check mark on the box before the order number
3. Choosing Mark Fulfilled on the toggle box on top of the order list
4. Finally click apply
8. Tax
Mark Roberts sets up and places retailers in the correct tax class with relevant rates, according to location and uses the principle of Nexus Tax - Sales Tax is collected if the customer and the retailer is in the same state, when computing for Sales Tax.
Two type of Sales Tax is automatically computed for every transaction: State Tax + Local Tax.
Local Tax is determined by zipcode.
Shipping Tax
Applicable shipping tax is also collected at the point of purchase depending on the tax rule of the retailer's state.
9. Email Notification
Several emails are set up in the Marketplace.
- Vendor Registration (Marketplace Admin) – Sent when vendor submits registration form.
- Vendor Registration (Retailer) – Sent to confirm registration form was submitted to store owner.
- Order Email (Retailer) – Notifies retailer of a new order. Retailers MUST NOT fulfill an order when a new order email is recieve. This email simply informs the retailer to allocate inventory and that Credit Card details are being processed and cleared.
- Canceled Order Email (Retailer) – Sent to notify vendor that customer canceled.
- Retailer Approval – Sent to retailers with login and password when registration is approved.
- Product Added Notice – Sent to the Marketplace Administrator to review when product is added by a vendor.
- Order Note to Customer – Sent to customer when vendor adds a note, e.g., Tracking number, personal thank you.